

In VMware vCenter environments, a virtual machine may occasionally remain visible in the inventory even though it has already been removed from the ESXi host. These objects are typically displayed as orphaned, inaccessible, or as incomplete VM records. Under normal conditions, such records can be removed from the vSphere Client by using Remove from Inventory. However, in some cases the VM object remains in the vCenter database and cannot be removed through the graphical interface. In this case, the following VM was still visible in the vCenter inventory:
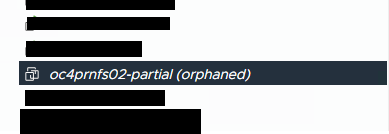
oc4prnfs02-partial (orphaned)After the required checks were completed, it was confirmed that the VM was no longer in use and only remained as a stale inventory record in vCenter. The goal of this procedure is to remove only the orphaned VM record without affecting any active systems.
Identifying the Existing Records
The first step is to search the vCenter database for objects matching the VM name.
select id, name
from vpx_entity
where name like '%oc4prnfs02%';
The query returned two different objects:
  id  |        name
------+--------------------
 8419 | E-oc4prnfs02
 3049 | oc4prnfs02-partial
At this stage, it is important to clearly distinguish between the two records. The object that needs to be removed is:
VM Name : oc4prnfs02-partial
ID      : 3049
MoRef   : vm-3049
The following object must remain in the environment:
ID   : 8419
Name : E-oc4prnfs02
For this reason, all database operations described below must target only ID 3049.
Checks Before Starting
Direct modification of the vCenter database should not be treated as a routine management task. It should only be used after confirming that the VM is genuinely orphaned and after normal inventory removal methods have failed. Before making any changes, it is recommended to have a current VCSA backup or an appropriate rollback point available. The following should also be confirmed:
- The VM is no longer running on any ESXi host.
- The VM is not being used by another active system.
- The object is not part of an active clone, backup, restore, migration, or similar task.
- The VM ID has been verified carefully.
- A recovery plan is available in case the database change needs to be rolled back.
This is particularly important when multiple objects have similar names.
Try the Standard Removal Method First
Before modifying the database, always try to remove the VM through the vSphere Client.
For the affected VM:
Right Click
→ Remove from Inventory
If this works, there is no need to perform any manual database cleanup. Only proceed with the database method if the object cannot be removed normally and it has already been confirmed that the VM is no longer required.
Connecting to the vCenter Database
Connect to the vCenter Server Appliance through SSH using the root account.
ssh root@vcenter01If Bash shell is not enabled, run:
shell.set --enabled true
shell
Then connect to the vCenter PostgreSQL database:
/opt/vmware/vpostgres/current/bin/psql -d VCDB -U postgresA successful connection will display:
VCDB=#Verifying the Target Object
Before deleting anything, confirm the VM record again.
select id, name, type_id, parent_id
from vpx_entity
where id in (3049,8419);
The VM information can also be checked in the VPX_VM table:
select *
from vpx_vm
where id=3049;
The purpose of these checks is to make sure the object being removed is definitely:
3049 | oc4prnfs02-partialand not the active object with ID 8419.
Stopping the VPXD Service
Before making manual changes to the database, the vmware-vpxd service should be stopped so that vCenter does not modify the same object while the cleanup is in progress.
Exit PostgreSQL first:
\qThen stop the VPXD service:
service-control --stop vmware-vpxdConfirm its status:
service-control --status vmware-vpxdThe expected result is:
StoppedDuring this period, some vCenter management functions may temporarily be unavailable. This is expected.
Removing the Orphaned VM Records
Once vmware-vpxd has been stopped, reconnect to the database:
/opt/vmware/vpostgres/current/bin/psql -d VCDB -U postgresThen remove only the records related to VM ID 3049:
delete from VPX_COMPUTE_RESOURCE_DAS_VM
where VM_ID=3049;

delete from VPX_COMPUTE_RESOURCE_DRS_VM
where VM_ID=3049;

delete from VPX_COMPUTE_RESOURCE_ORC_VM
where VM_ID=3049;

delete from VPX_VM_SGXINFO
where VM_ID=3049;

delete from VPX_GUEST_DISK
where VM_ID=3049;

delete from VPX_VM_VIRTUAL_DEVICE
where ID=3049;

delete from VPX_VM_DS_SPACE
where VM_ID=3049;

delete from VPX_NON_ORM_VM_CONFIG_INFO
where ID=3049;

delete from VPX_NORM_VM_FLE_FILE_INFO
where VM_ID=3049;

delete from VPX_VDEVICE_BACKING_REL
where VM_ID=3049;

delete from VPX_VIRTUAL_DISK_IOFILTERS
where VM_ID=3049;

delete from VPX_VM_STATIC_OVERHEAD_MAP
where VM_ID=3049;

delete from VPX_VM_TEXT
where VM_ID=3049;

delete from VPX_VM
where ID=3049;

delete from VPX_ENTITY
where ID=3049;

delete from VPX_DVPORT
where connectee='vm-3049';
Some commands may return:
DELETE 0This does not necessarily indicate a problem. It simply means that no record for VM ID 3049 existed in that particular table. Other commands may return;
DELETE 1which indicates that one matching record was successfully removed.
Verifying the Cleanup
After the cleanup is complete, verify that the orphaned object has been removed.
select id, name
from vpx_entity
where id in (3049,8419);
The expected result should contain only:
  id  |       name
------+----------------
 8419 | E-oc4prnfs02
The oc4prnfs02-partial object with ID 3049 should no longer appear.
You can also verify the VM table:
select *
from vpx_vm
where id=3049;
The expected result is:
(0 rows)It is also useful to check whether any stale Distributed Switch port relationship remains:
select *
from vpx_dvport
where connectee='vm-3049';
Ideally, this should also return:
(0 rows)Starting the VPXD Service Again
Once the database checks are complete, exit PostgreSQL:
\qStart the VPXD service again:
service-control --start vmware-vpxdCheck the service status:
service-control --status vmware-vpxdIf required, the overall vCenter service status can also be reviewed with:
service-control --status --allAfter the services return to normal, refresh or log back in to the vSphere Client. The following orphaned object should no longer be visible;
oc4prnfs02-partial (orphaned)The valid object:
E-oc4prnfs02should remain unchanged.
Why the VPX_ENTITY Record Should Not Be Deleted Alone
At first glance, it may seem sufficient to run only:
delete from vpx_entity
where id=3049;
However, vCenter does not store all VM information in a single table. A virtual machine may have related records for:
- Virtual disks
- Virtual hardware
- Datastore usage
- DRS and DAS configuration
- Network connections
- Distributed switch ports
- Additional VM metadata
If only the main VPX_ENTITY record is removed, related records may remain in the database. This can lead to inconsistent inventory data and may cause unexpected behavior later in vCenter. For this reason, the related VM records should be cleaned up first, followed by the main VPX_VM and VPX_ENTITY records.
In this case, the following stale VM object was present in the vCenter inventory:
oc4prnfs02-partial (orphaned)Database verification showed that the object was associated with:
ID    : 3049
MoRef : vm-3049
A separate object with a similar name:
8419 | E-oc4prnfs02was identified as a different record and was left untouched. After stopping the vmware-vpxd service, only the database records associated with VM ID 3049 were removed. The service was then started again and the environment was checked to confirm that the stale VM object had disappeared while the remaining inventory objects were unaffected. This method can be useful when a virtual machine no longer exists on the ESXi host but still appears in vCenter as an orphaned or stale object, and standard removal methods are not successful. Because this procedure involves direct modification of the vCenter database, it should only be performed during a controlled maintenance window, with a valid recovery plan in place and after the target VM ID has been carefully verified.